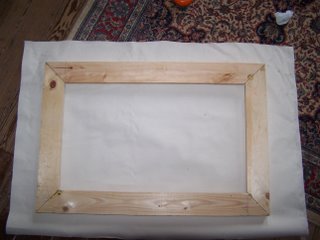
 The first step is cutting the canvas down to size. You want roughly 3 to 4 inches of canvas beyond the edge of the stretcher. Center the stretcher in the middle of the canvas.
 Start stapling. I usually start on the longest edges of the canvas (unless it is a square of course). Place one staple through the canvas in the center of the stretcher's edge. Stretch the canvas tight from the opposite side (grip edge of canvas with plyers and leverage with the back of the stretcher) and staple it in place. Staple the canvas into the back of the stretcher, not the edge. Repeat on the short edges. Then, working towards the corners from the middle staple, stretch and staple the canvas. Alternate between the short edges and long edges; try to reach the corners at the same time.
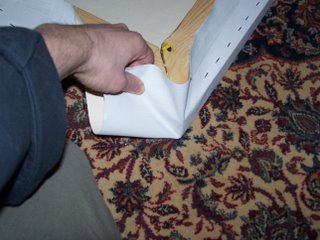
 When you reach the corner, fold one edge of canvas under the other and tuck it in place (see last photo in sequence). To make a neat corner, some trimming with the scissors may be necissary.


 Once you have a neat looking corner, staple it in place. Repeat for each corner. I try to make the corner seam (see picture above) face down or up depending on whether it will be the top or bottom edge of the painting. Then, if it is hung without a frame, it ought to be invisible.
Sorry, this picture ought to have been earlier in the sequence. This is me tucking one edge under the other.

2 comments:
John, check this out:
http://forum.portraitartist.com/showthread.php?t=7016
I like the idea of tacking the corners temporarily. I haven't tried it yet but it makes sense, doesn't it?
tex macrae
Pretty cool tread, thanks for the link. It never occured to me to tack the corners, but I'm going to give it a try. As you said, it makes good sense.
Post a Comment